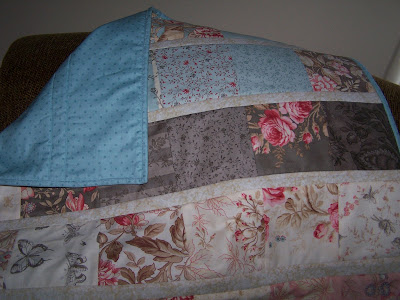
Anyway, I wanted to share with you my new love of sewing! Let me begin by saying that my mom is this phenomenal sewer. In fact, she can do anything. But for her birthday in March, I determined with myself that I would make a quilt for my mother. Not a full-size quilt, but a lap quilt.
I found a lovely pre-cut pack of squares at a small fabric store in Jackson, MI, called Country Stitches. (Who wouldn't love a store called that!??) Then one day while waiting for my favorite deli Hillsdale Filling Station (http://www.facebook.com/pages/Hillsdale-Filling-Station-Deli/160368094007560) I walked over to the sewing machine store there in downtown Hillsdale and was pleasantly surprised to find that they had the little square packs, too! A treasure, in my own backyard. I had no idea!! In fact, Trevathan's had TONS of different fabric CHARM PACKS, but this one from MODA just spoke to me. So I bought some and headed home.
I was terrified to begin....
 |
| Am I really going to try this? |
But I knew I had to do it.
For better or worse.
And since I am already poorer,
I dove in.....
I sewed my mom's quilt top.
| ||
| We received this iron as a wedding gift in 1993. I loved that I was ironing every single seam with the same iron I'd used for almost 20 years. |
But I realized very quickly that I didn't know how to actually quilt. Time ran out and I had to wrap it as it was. Still, it was beautiful, and I loved creating it. (I hope she loved it as much as I loved making it.)
That project inspired me to make one for my daughter, who was soon moving away. But this time around I was determined to do the WHOLE THING. So I squared my shoulders and decided to make a lap quilt using the QUILT AS YOU GO technique!
It was UH-MA-ZING!!!
I was addicted from the start!!
I made a third quilt before I finally hit pause! (I'll post pictures of that gem below.)
For Vanessa's quilt, I first began by sewing together the charm pack blocks that I wanted to use, and also chose a coordinating fabric to add more contrast to the quilt. I cut those into strips, and was ready to begin assembly--the step before sewing begins!

Step Three: Trip up the edges so that all four sides of your quilt are even. You can see in this photo that the edges are even.Like magic, your quilt is almost complete!
Step Four: Apply binding. I chose to make my own. THIS TOTALLY ROCKED!!
Using the scissors that my sister gave me about five years ago for the very first time, I cut fabric out and sewed it into strips.
Pressing it half then sewing the raw edges to the quilt.
Final Step: By hand fold over and blind stitch the binding to the front of the quilt. If you do it right, you won't even see your stitches. I did not do it correctly.
And....
SUCCESS!!
And here's a quick peek at the quilt I made for Lynn. She asked me to make her a lap quilt for an upcoming trip, picked out the fabric herself. I was nervous to make something requested by someone else. Especially using a fabric I'd never used before, but it was great.
So sassy!! Sew Sassy!!


